

How To Repair Cracked Concrete: Driveways, Slabs & Walls
Cracked concrete is more than an eyesore, it’s a liability waiting to happen. Whether it’s a hairline fracture in your parking lot or a widening gap in a sidewalk, knowing how to repair cracked concrete can save you thousands in future replacement costs and help you avoid slip-and-fall claims.
At Denver Snow & Commercial Property Services, we’ve repaired concrete across the Denver metro area for over 40 years. We’ve seen what happens when small cracks get ignored through freeze-thaw cycles, and we’ve also seen property managers successfully tackle minor repairs themselves before calling in professionals for the bigger jobs.
This guide walks you through the materials, techniques, and step-by-step process for repairing cracked concrete on driveways, slabs, and vertical walls. You’ll learn when a DIY fix makes sense and when it’s time to bring in a crew.
Size up the crack and decide on a repair
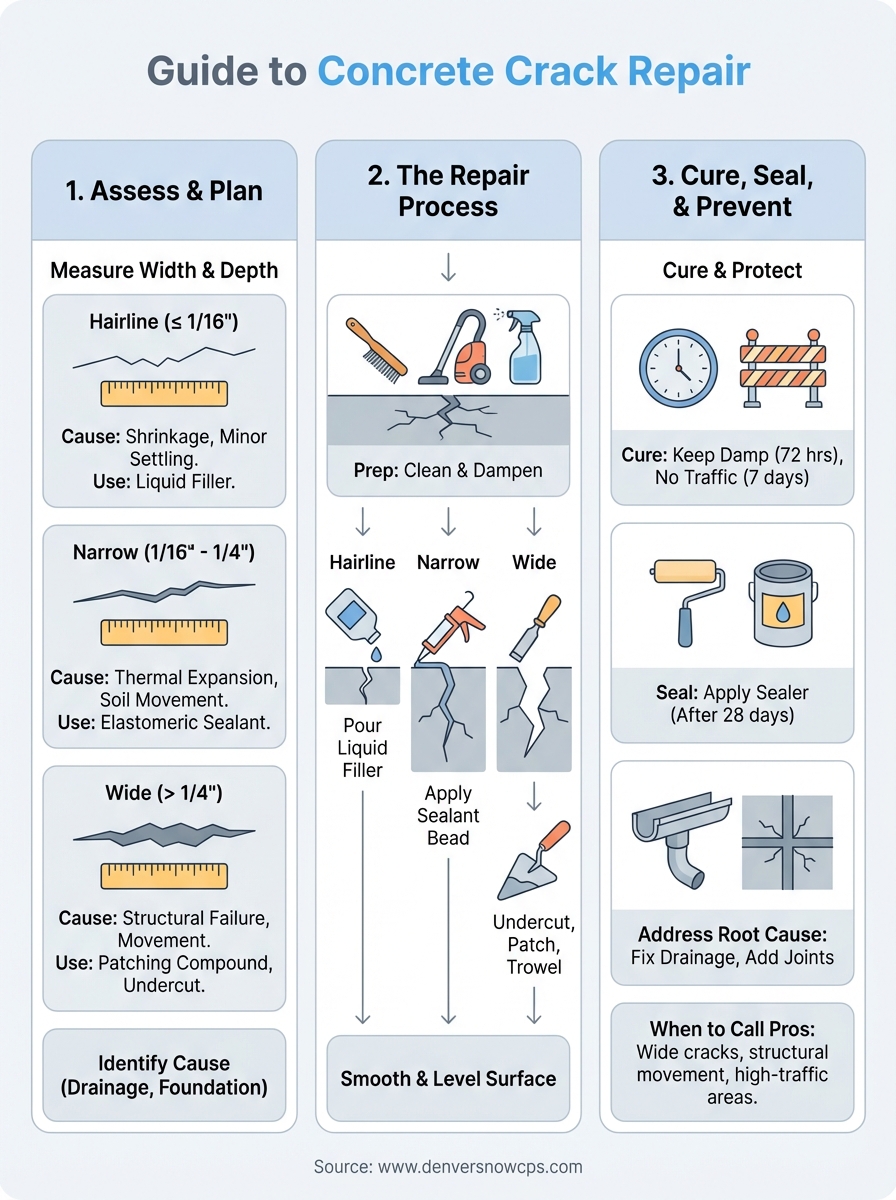
Before you buy materials or start cleaning out a crack, you need to measure the width and assess the depth of the damage. Not all cracks are created equal, and the repair method that works for a hairline fracture will fail completely on a wide, structural gap. Grab a ruler, a flashlight, and a flat screwdriver to probe the depth.
Hairline cracks (up to 1/16 inch)
These surface-level fractures rarely penetrate more than a quarter inch deep and typically result from concrete shrinkage during curing or minor settling. You’ll see them most often on newer slabs and vertical walls. A concrete sealer or liquid crack filler is your best option here, both materials thin enough to penetrate the narrow opening without leaving a raised bead on the surface.
Hairline cracks don’t usually threaten structural integrity, but they allow water infiltration that can expand during freeze-thaw cycles. If you’re in Denver’s climate, ignoring even these small cracks invites bigger problems within a single winter season.
Narrow cracks (1/16 to 1/4 inch)
Once a crack reaches this width, you’re dealing with thermal expansion stress or soil movement beneath the slab. These cracks often run deeper than hairline fractures and require a thicker filler material like concrete crack filler or elastomeric sealant. You can still handle this repair yourself, but you’ll need to clean the crack more thoroughly and use a caulk gun for application.
Check if the crack runs through to the other side of a slab by pouring water on top and watching for moisture underneath, this tells you whether you’re dealing with a through-crack that needs more aggressive sealing.
These cracks are your early warning system for foundation or drainage issues. If you’re seeing multiple cracks of this size across a driveway or parking lot, the problem likely sits below the concrete itself.
Wide cracks and structural damage (over 1/4 inch)
Any crack wider than a quarter inch signals significant movement or structural failure in the concrete. You’ll need vinyl concrete patcher, hydraulic cement, or even a full-depth repair with bonding adhesive. This is also the threshold where most property managers call in professional concrete contractors because the repair requires proper joint preparation and sometimes rebar reinforcement.
When you’re evaluating how to repair cracked concrete at this scale, look for these warning signs:
- Vertical displacement: One side of the crack sits higher than the other
- Spalling edges: Concrete flaking or breaking away at the crack line
- Multiple branches: The crack splits into two or more directions
- Active movement: The crack widens visibly over weeks or months
Wide cracks in high-traffic areas like commercial driveways and loading zones create trip hazards and liability exposure that go beyond cosmetic concerns. You’re looking at a repair that may take a full weekend and require traffic rerouting during the cure time.
Gather tools and prep the concrete
You can’t fix concrete with improvised tools and half measures. Before you start any repair work, assemble the right equipment and prepare the surface properly, or you’ll watch your patch crack loose within weeks. Most property managers already have basic tools on hand, but you’ll need specialized concrete repair materials based on the crack width you measured in the previous section.
Essential repair tools and materials
Your basic toolkit covers most concrete repairs from hairline cracks through quarter-inch gaps. You need a wire brush or angle grinder to clean the crack, a shop vacuum to remove debris, and a caulk gun for applying sealants. For deeper cracks, add a cold chisel and small sledgehammer to undercut the edges and create a better bond.
Stock these materials based on crack size:
- For hairline cracks: Concrete sealer or liquid crack filler, paintbrush
- For narrow cracks (1/16 to 1/4 inch): Concrete crack filler, elastomeric sealant, backer rod for deep cracks
- For wide cracks (over 1/4 inch): Vinyl concrete patcher, hydraulic cement, bonding adhesive, trowel, margin trowel
- Universal supplies: Safety glasses, work gloves, mixing bucket, spray bottle with water
Buy more material than you think you need, running short halfway through a repair means leaving an open crack exposed to moisture while you make another hardware store run.
Clean and prep the damaged area
Remove all loose concrete, dirt, oil, and vegetation from the crack using your wire brush or angle grinder with a wire wheel attachment. You want to expose solid, stable concrete on both sides of the crack. For narrow cracks, use the tip of a flathead screwdriver to scrape out any debris lodged deep in the opening.
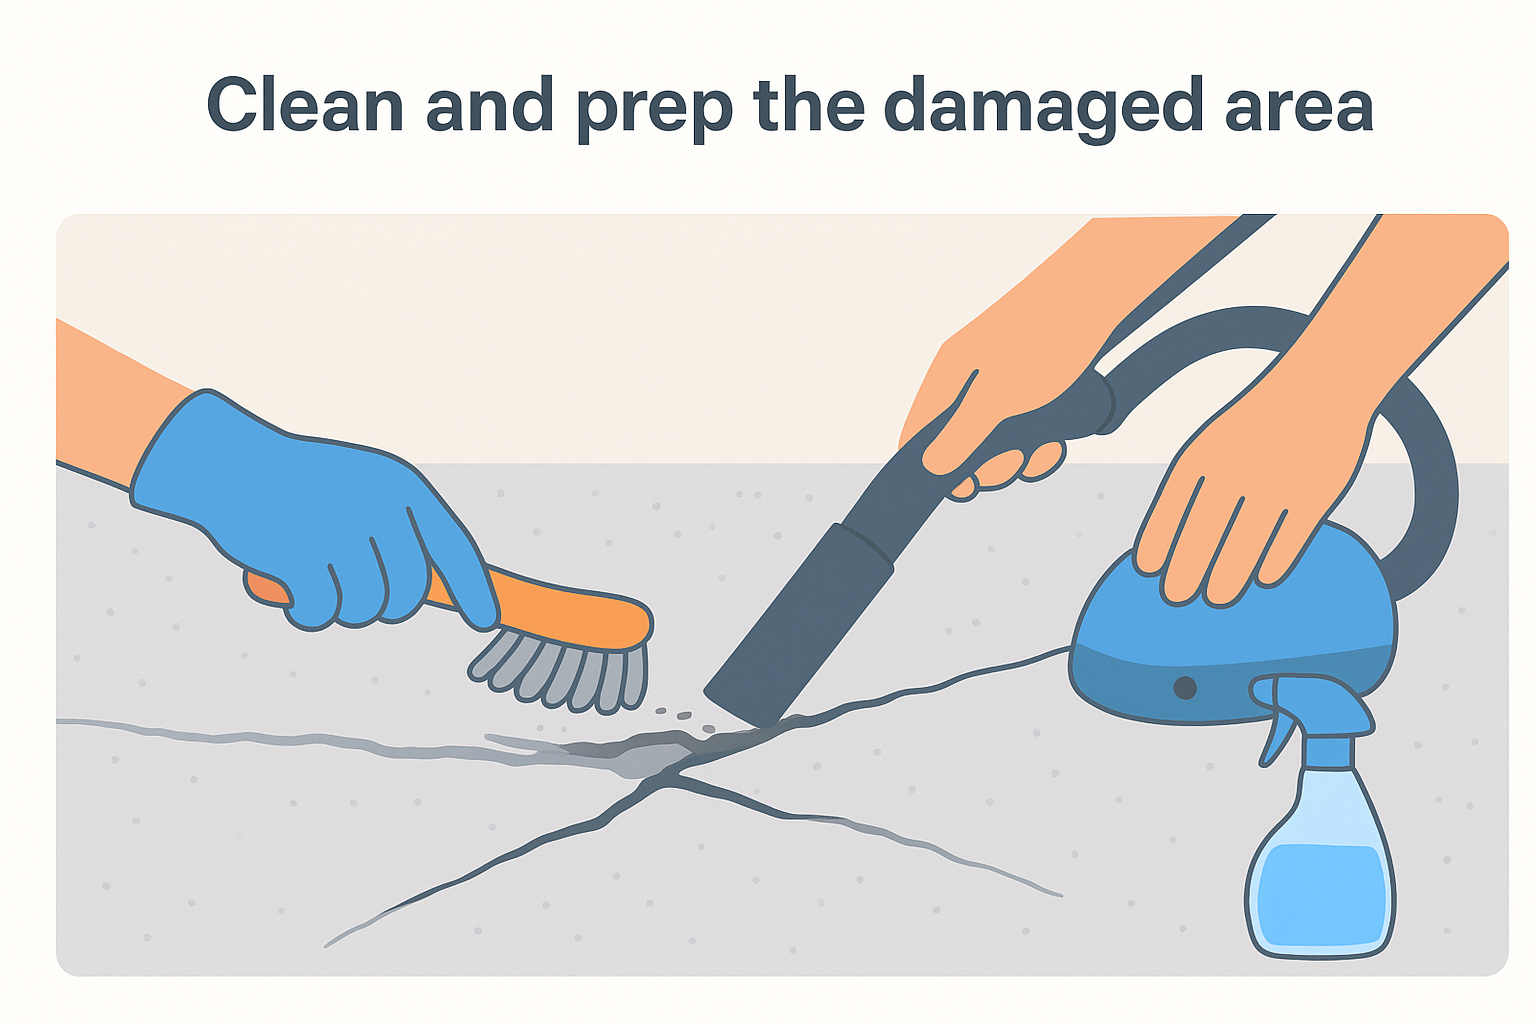
Vacuum the entire crack thoroughly with a shop vacuum, then spray it down with water to remove dust that your vacuum missed. The concrete should be damp but not saturated when you apply most fillers and patchers. If water pools in the crack, wait 15 to 30 minutes for it to absorb before you start the repair. This moisture helps the filler bond chemically to the existing concrete rather than just sitting on top of a dusty surface.
Fix hairline and narrow cracks up to 1/4 inch
Small cracks respond well to simple repair methods that you can complete in under an hour per section. The key difference between fixing hairline versus narrow cracks lies in the viscosity of your filler material and how you apply it. Both repairs work best when temperatures sit between 50°F and 80°F, so plan your work during Denver’s spring or fall months when concrete can cure properly without extreme heat or freezing conditions.
Apply liquid filler for hairline cracks
Pour liquid crack filler directly into hairline fractures without using a caulk gun. The low-viscosity formula flows into narrow openings that thicker sealants can’t penetrate. Start at one end of the crack and move slowly along its length, allowing the liquid to soak into the fracture rather than puddle on the surface.
You’ll see the filler disappear into the crack as the concrete absorbs it. Apply a second coat after 30 minutes if the crack still looks open. Most liquid fillers dry clear or light gray and won’t create a visible repair line on your concrete surface. Avoid walking on the treated area for at least two hours while the filler cures below the surface.
Liquid fillers work through capillary action, so don’t overfill the crack or you’ll waste material that just sits on top and peels off later.
Seal narrow cracks with elastomeric caulk
Load your caulk gun with concrete crack filler or elastomeric sealant for cracks between 1/16 and 1/4 inch wide. Cut the applicator tip at a 45-degree angle to match your crack width. Hold the gun at that same 45-degree angle to the crack and apply steady pressure as you move along the entire length in one continuous bead.
Smooth the sealant immediately with a wet finger or small putty knife, pressing it firmly into the crack to eliminate air pockets. The goal is to create a slightly concave surface that sits just below the surrounding concrete level. This prevents the sealant from getting scraped off by snow shovels or vehicle tires. Most elastomeric sealants cure in 24 hours, but you should keep foot traffic off the repair for at least 48 hours to ensure a complete bond.
Fix wide cracks, joints, and broken edges
Wide cracks demand a more aggressive repair approach than the simple sealants you used on hairline fractures. When you’re dealing with gaps over a quarter inch wide, you need to create mechanical bonding through undercut edges and use high-strength patching compounds that can withstand structural movement. These repairs take longer and require more physical work, but they’re the only way to restore stability to damaged concrete without a full replacement.
Undercut and fill structural cracks
Use your cold chisel and small sledgehammer to undercut the crack edges at a 45-degree angle, creating a wider base than the surface opening. This inverted-V profile prevents your patch material from popping out under pressure. Chisel down to at least three-quarters of an inch deep for cracks wider than half an inch. Remove all loose material and vacuum the entire channel thoroughly.
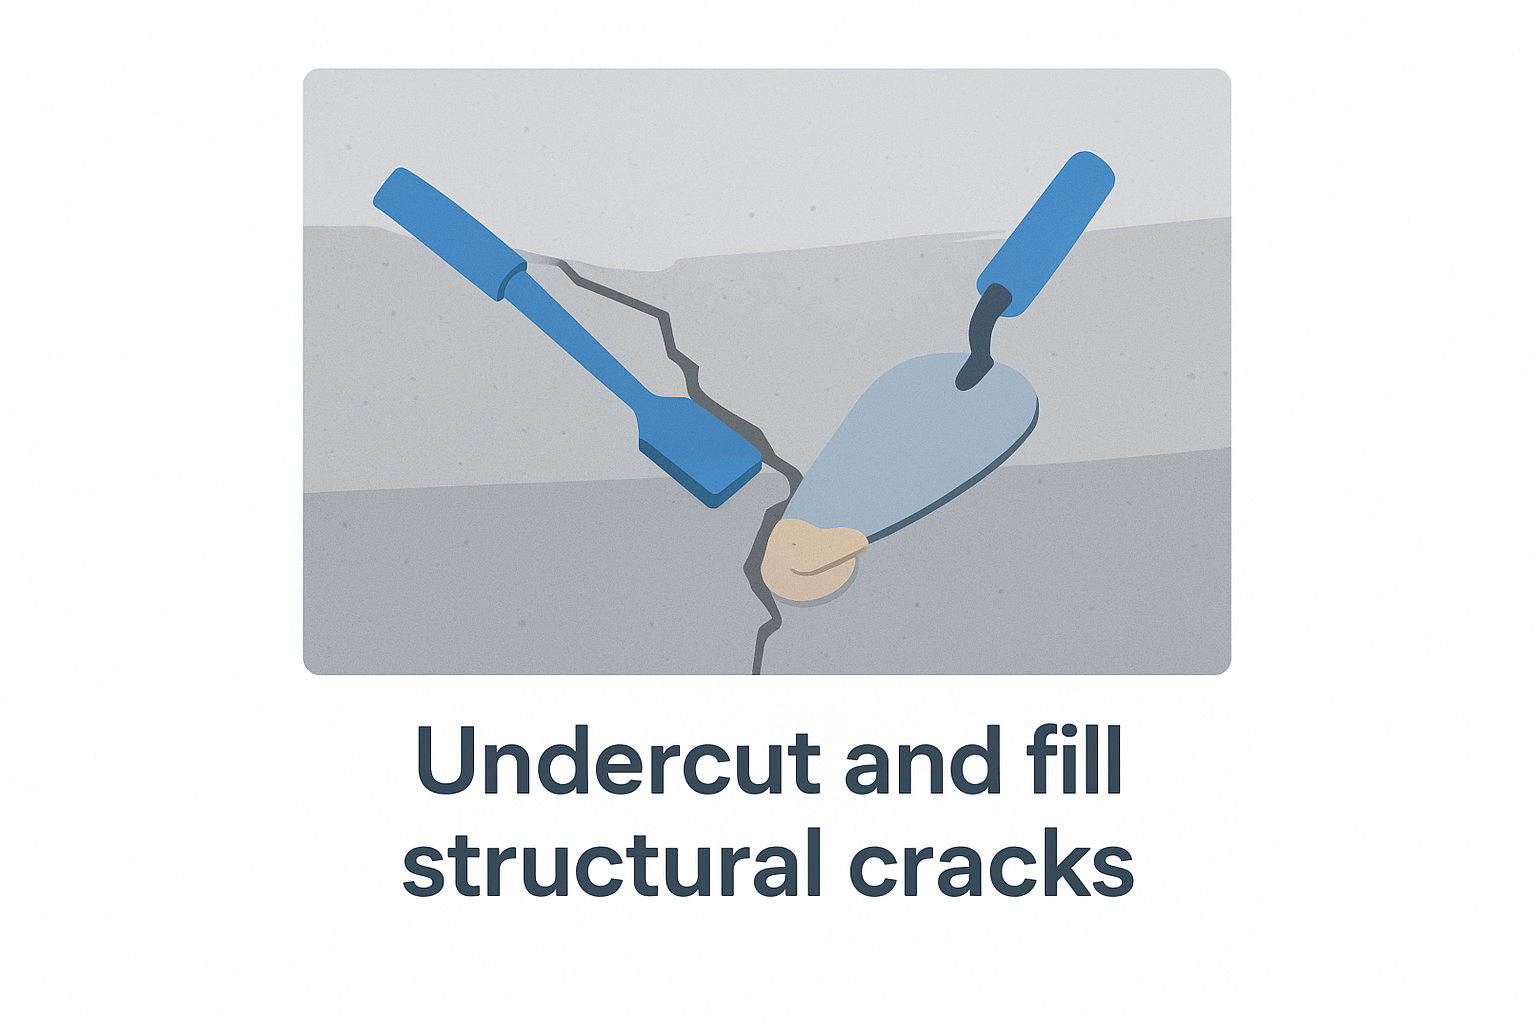
Mix your vinyl concrete patcher or hydraulic cement according to package directions, aiming for a thick peanut butter consistency. Apply bonding adhesive to the crack surfaces if your product requires it, then pack the filler into the channel using a margin trowel. Work from the bottom up and push firmly to eliminate air pockets. Overfill the crack slightly, then scrape the surface level with the surrounding concrete using your trowel held at a low angle.
For control joints that have cracked, install a backer rod before applying sealant to maintain the joint’s designed flexibility and prevent three-sided adhesion that causes premature failure.
Patch broken edges and corners
Broken concrete edges need temporary formwork to hold patch material in place while it cures. Cut a board to match the original edge profile and secure it with stakes or bricks. Clean the damaged area back to solid concrete, removing all loose fragments and creating a rough surface for better adhesion.
Coat the repair area with bonding adhesive, then fill with vinyl concrete patcher in layers no thicker than one inch at a time. Compact each layer with your trowel before adding the next. Once you’ve built up to the original surface level, smooth the patch to match surrounding concrete texture. Leave the formwork in place for 24 hours minimum before removing it carefully to avoid chipping your fresh repair.
Cure, seal, and prevent repeat cracking
Your repair work means nothing if the patch fails during the first freeze-thaw cycle or cracks again within months. Proper curing protects your investment of time and materials, while surface sealing adds a protective barrier against water infiltration. Most repeat cracking happens because the underlying problem never got fixed, so you need to address what caused the original damage.
Monitor the cure time
Keep all repaired areas damp for the first 72 hours after application by misting them with water three to four times daily. This slow curing process allows the patch material to reach its maximum strength and prevents surface cracking from rapid moisture loss. Cover fresh repairs with plastic sheeting between watering sessions if temperatures exceed 80°F or if you’re working in direct sunlight.
Block vehicle and foot traffic from the repaired area for at least seven days regardless of what the product label claims. Most concrete crack fillers gain only 60 percent of their strength in the first 24 hours. You need that full week for the chemical bonding process to complete before subjecting the repair to load stress.
Apply surface sealer
Wait 28 days after completing your repair before applying a penetrating concrete sealer to the entire surface. This extended cure time ensures the patch has reached full strength and won’t trap moisture that could cause delamination. Choose an acrylic or siloxane-based sealer designed for exterior horizontal surfaces that can withstand tire traffic and freeze-thaw cycles.
Apply sealer when temperatures will stay above 50°F for 24 hours and no rain is forecast, or you’ll watch your coating fail before it can properly penetrate.
Address the root cause
Learning how to repair cracked concrete is only half the solution. You need to identify why the concrete cracked in the first place. Poor drainage causes most concrete failures in commercial properties, so check for standing water, clogged gutters, and downspouts that dump directly onto your slabs.
Install proper drainage systems, improve soil compaction, or add control joints to accommodate thermal expansion. Without fixing these underlying issues, you’re just setting yourself up for another repair cycle next season.
Final takeaway
You now know how to repair cracked concrete using methods that match your specific damage type. Small surface cracks need liquid fillers or elastomeric sealants, while structural gaps require undercut edges and high-strength patching compounds. The repair itself takes only hours, but proper curing and surface protection determine whether your work lasts years or fails within months.
Remember that repeated cracking points to drainage or foundation problems your patch can’t fix alone. If you’re seeing multiple wide cracks across parking lots or loading zones, or if your repairs keep failing, the issue sits below the concrete surface. Professional concrete contractors can assess soil stability, install proper drainage systems, and determine whether you need full-depth reconstruction instead of another patch job.
Denver Snow & Commercial Property Services has handled commercial concrete repairs across the Denver metro area since 1983. We evaluate the root cause of your concrete damage and provide solutions that protect your property value and reduce liability exposure.


